From what I’ve seen managing properties across the Klang Valley, the real challenge after a contractor hands over the keys isn’t just the visible debris. Our team relies on this exact post renovation cleaning checklist as the standard order of operations for a safe move-in. Sequencing matters just as much as the cleaning products you choose.
Our full post-renovation cleaning service page shows how we handle these specific challenges in local condos. A systematic approach prevents you from pushing the same fine silica dust around the room for hours.
We also created a detailed explainer on what post-renovation cleaning includes to break down the reasoning behind this specific order. Let’s look at the exact steps needed to clear out the residue and prepare your space for occupancy. We are also available right now if you prefer to skip the manual labour and WhatsApp us for a quick quote.
Stage 1: Whole-property prep
Setting up the site properly prevents delays and protects your valuable fixtures. Our cleaners always confirm the contractor has fully vacated the premises before bringing in equipment. Joint Management Bodies (JMBs) in areas like Mont Kiara strictly enforce renovation hours, usually limiting work to 9 AM to 5 PM on weekdays.
We take extensive before-and-after photos to document the starting condition. Market data from 2026 confirms that 15% to 20% of renovation budgets experience overruns due to disputes over surface damages.
Our standard protocol involves turning off the air-conditioning entirely. Running the HVAC system recirculates fine construction dust into the fresh coils of your Daikin or Panasonic units.
- Confirm the contractor has fully vacated with no remaining tools or active work
- Walk through with photos to document the starting condition
- Remove or cover sensitive items like electronics and antiques
- Open windows for ventilation instead of using mechanical cooling
- Test air-conditioning and leave it OFF to avoid recirculating dust during cleaning
Stage 2: Coarse debris removal
Clearing the largest pieces of waste first opens the path for detailed surface work. Our initial pass focuses on loose construction debris like tile pieces and cement crumbs. Removing these items manually prevents them from scratching your new floor tiles during later mopping stages.
We carefully peel away plastic protective film from doors, fixtures, and appliances. Leaving that film on too long causes the adhesive to bond permanently with the surface underneath.
Our team then gathers all the cardboard, foam, and plastic wrap packaging materials. Proper disposal of construction waste is crucial, as unauthorized dumping in condo bins often triggers heavy fines from local management.
- Clear loose construction debris like tile pieces and cement crumbs
- Remove plastic protective film from doors, fixtures, and appliances
- Gather packaging materials including cardboard, foam, and plastic wrap
- Peel adhesive backing from labels and protective stickers
- Bag all waste and remove it to the designated heavy disposal point
Stage 3: High-level dusting (top-down)
Gravity dictates that all dusting must start at the absolute highest point in the room. Our technique ensures that any dislodged particles fall onto surfaces that have not yet been cleaned. Fine hacking dust settles heavily on top of built-in wardrobes and decorative cornices.
We use extendable microfibre wands to reach these hidden spots without spreading the dirt into the air. Ceiling fans and light fittings require a delicate touch to clean both the interior and exterior of shades.
Our approach to air-con units involves wiping the exterior housing only. Cleaning the internal silica-clogged filters should be handled as a separate, specialized maintenance task.
- Wipe ceiling corners, edges, and decorative mouldings
- Clean ceiling fans, focusing on blades and motor housings
- Dust light fittings, including the interior and exterior of shades
- Wipe the exterior of air-con units while leaving internal filter cleaning for HVAC specialists
- Clear the tops of door frames and high cabinet edges
- Dust the tops of wardrobes, which is a chronically missed spot
Stage 4: Walls and fixtures
Freshly painted walls are surprisingly fragile and require a careful, dry approach first. Our cleaners perform a dry-wipe using flat microfibre mops to lift settled dust without creating mud streaks. High humidity in the Klang Valley causes construction dirt to stick stubbornly to vertical surfaces.
We spot-clean paint splatters using gentle, non-abrasive tools to protect the new finish. Formaldehyde and Total Volatile Organic Compounds (TVOCs) off-gas heavily from new carpentry and wall treatments.
Our process helps clear the physical particulate matter that traps these chemical odours indoors. Paying close attention to the small details makes a huge visual difference in the final result.
- Perform a wall dry-wipe to safely lift settled dust
- Spot-clean paint splatter without damaging the finish
- Wipe down switch plates and electrical outlets
- Clean door frames, handles, and floor skirting
- Polish mirrors and decorative glass panels
- Dust curtain rails and window blinds
Stage 5: Kitchen (detail)
The kitchen demands intensive detailing due to the combination of new appliances and extensive cabinetry. Our team focuses heavily on removing sawdust from cabinet exteriors, interiors, and hidden hinge mechanisms. Stainless steel fixtures require immediate attention to prevent long-term damage.
We remove the protective film from hobs and range hoods before the heat of cooking bakes the adhesive onto the metal. New appliances like ovens, fridges, and microwaves arrive with factory dust that must be sanitized before food storage.
Our final step involves descaling the sink and tap to remove any hard water stains left by the contractors. A thorough wipe of all surfaces ensures the cooking area is completely food-safe.
- Clean cabinet exteriors, interiors, and hidden hinges
- Wipe the hob, range hood exterior, and splashback
- Descale the sink, polish the new tap, and perform a final wipe of all surfaces
- Remove backsplash tile film and leftover adhesive
- Sanitize the interior of new appliances like the oven, fridge, and microwave
- Wipe out drawer interiors and polish handles
Stage 6: Bathrooms (detail)
Luxury condo bathrooms often feature expensive stone or matte tiles that require specialized chemistry to clean safely. Our teams use a non-acidic mineral remover to clear cement film on new tiles. Harsh acidic cleaners can easily etch and permanently damage premium bathroom finishes.
We apply specific grout haze removers that are matched to the exact type of tile installed. Sealant smears around new fixtures are common and require careful lifting to avoid breaking the watertight seal.
Our detailing process includes a full floor scrub that targets the grout lines directly. The area behind the toilet base is notorious for hiding thick layers of construction dust.
- Apply non-acidic mineral remover for cement film on new tile
- Clear grout haze using tile-compatible solutions
- Clean up sealant smears around fixtures and basins
- Polish taps, showerheads, metal fittings, and mirrors to a streak-free shine
- Scrub the floor and detail the grout lines
- Clean the hidden area behind the toilet and its base
Stage 7: Bedrooms and living areas
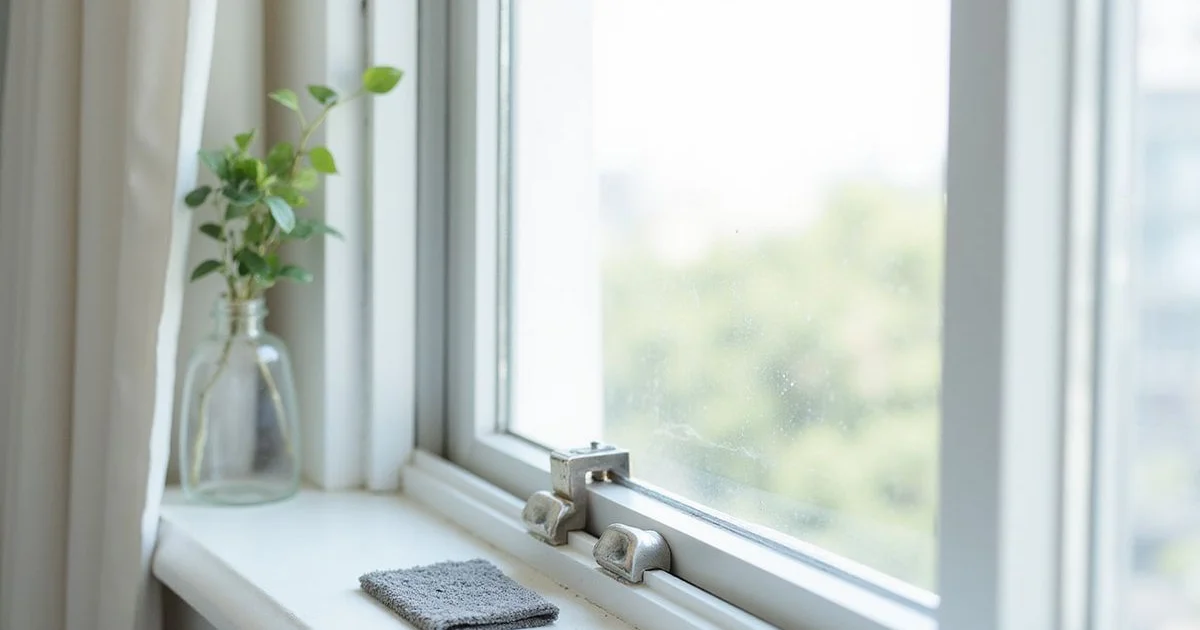
Living spaces need to be completely free of fine particulate matter to ensure healthy indoor air quality. Our interior wipe-down targets wardrobe shelves and sliding door tracks where dust easily packs tightly. In high-rise buildings, wind pressure drives fine construction dirt deep into aluminium window frames.
We spend extra time detailing window sills and tracks because they are chronically forgotten by basic cleaning services. Glass polish is applied to the interior of windows to remove smudges and off-gassing residue.
Our final pass covers door interiors, handles, and the top edge of the skirting boards. A clean bedroom provides a safe, allergen-free environment for your first night in the new home.
- Wipe down wardrobe interiors and all shelving units
- Clean window sills to remove heavy dust buildup
- Detail window tracks using specialized narrow tools
- Polish the interior glass of all windows
- Wipe door interiors and sanitize handles
- Dust and wipe the floor skirting
Stage 8: Floors (multi-pass)
Effective floor cleaning after a renovation requires multiple distinct passes to prevent a cloudy finish. Our first step is always a dry pickup using a HEPA-filtered vacuum cleaner. Sweeping fine silica dust with a broom simply launches it back into the air to resettle later.
We follow the vacuuming with a cement-film removal pass specifically for tile or stone surfaces. A specialized residue-removing solution is then used to mop the floors and neutralize any remaining chemicals.
Our final dry pass acts as a polish to leave the surface completely streak-free. Stubborn marks from shoes or dropped tools receive targeted spot treatments during this final stage.
- Execute a first HEPA vacuum pass for dry pickup
- Apply a cement-film removal pass on tile or stone floors
- Mop the area using a residue-removing solution
- Perform a final dry pass to polish the surface
- Spot-treat any stubborn scuff marks or paint drops
Stage 9: HEPA vacuum sensitive surfaces
Soft furnishings act like giant sponges that absorb airborne chemicals and construction dust. Our equipment standard includes HEPA-14 vacuums, which are crucial for capturing 99.995% of microscopic particulate matter. The EN 1822 standard for these vacuums ensures that allergens are trapped inside the machine rather than blown back out.
We thoroughly vacuum sofas, upholstery, and mattresses to extract embedded silica dust. Curtains and drapery require a gentle brush attachment to pull dirt from the fabric folds safely.
Our carpet and rug treatment lifts the heavy, abrasive particles that can ruin the fibres over time. Proper vacuuming of these materials significantly reduces post-renovation allergy flare-ups.
- Vacuum sofas and upholstery using a brush attachment
- Extract dust from mattresses if they were present during the work
- Clean curtains and drapery from top to bottom
- Deep vacuum carpets and rugs to remove abrasive silica
Stage 10: Final walkthrough
The final inspection ensures that no small details were missed during the intensive cleaning phases. Our supervisors check all surfaces under natural daylight whenever possible. Artificial lighting easily hides smears, streaks, and thin layers of white dust on light-coloured countertops.
We immediately re-treat any missed spots before packing up the equipment. Cabinet liners that were temporarily removed for cleaning are carefully replaced.
Our final touch is a quick glass and fixture polish to guarantee a perfect presentation. Documenting the end-condition with photos provides clear proof that the property is completely ready for move-in.
- Check all surfaces under natural daylight to spot hidden smears
- Re-treat any missed spots immediately
- Replace cabinet liners if they were temporarily removed
- Perform a final polish on glass and metal fixtures
- Document the end-condition with high-quality photos
Commonly missed spots
Standard one-time domestic cleans simply do not target the hidden areas where heavy construction dirt settles. Our specific training highlights these invisible traps to ensure a truly comprehensive result.
Using a reliable post construction checklist ensures nothing gets ignored. The table below outlines the items most frequently skipped by untrained cleaners and how to address them.
| Commonly Missed Spot | Why It Accumulates Dust | The Proper Solution |
|---|---|---|
| Window tracks | Fine dust packs tightly into the narrow rails. | Detail brushes and high-suction crevice tools. |
| Air-con filters | Silica clogs the mesh within days of normal HVAC operation. | Professional filter washing and drying. |
| Cabinet kickboards | Positioned at floor level out of direct sight lines. | Specific low-level vacuuming and wiping. |
| Top of cabinets | Completely invisible from a standard standing height. | Step ladders and extendable wand dusters. |
| Behind appliances | Hidden space behind the fridge and washing machine. | Pulling units forward for a deep floor scrub. |
| Switch plates | Dust collects heavily on the tiny top lip of the outlet. | Dry microfibre wiping to prevent electrical issues. |
| Door and frame tops | Flat, horizontal dust-collectors that no one ever sees. | Top-down dusting before floor cleaning begins. |
| Ceiling-light interiors | Debris falls into fittings with a removable diffuser. | Dropping the cover to wash and dry the glass. |
Problem materials
Certain renovation byproducts require chemical intervention rather than just hard scrubbing. Our teams carry specialized solutions because using the wrong product often causes permanent damage to new surfaces. A classic mistake is using vinegar on expensive stone floors, which etches the finish immediately.
We rely on commercial-grade, non-acidic mineral removers to safely lift cement haze. Construction adhesive residue from masking tape requires a citrus-based solvent like Goo Gone or a dedicated 3M adhesive remover.
Our approach prioritizes patience and proper chemical dwell times over brute force scraping.
| Problem Material | Common Mistake | The Correct Approach |
|---|---|---|
| Cement haze on tile | Using vinegar, which can etch some stone surfaces. | Apply a non-acidic mineral remover. |
| Grout film | Assuming standard floor cleaner will work. | Use a specific grout remover and check tile compatibility first. |
| Construction adhesive | Using a metal scraper that gouges the finish. | Apply a citrus-based solvent and prioritize patience over force. |
Handling a massive cleanup on your own takes time away from enjoying your newly upgraded home. Our dedicated teams are ready to step in when you need a fast, reliable turnaround. Most KL condos, averaging around 1,000 to 1,500 square feet, typically take a single day with a focused three-cleaner crew.
We invite you to WhatsApp us directly if your renovation is finished and you would rather hand the entire checklist to the professionals.